Unlocking new skills: Arduino Programming
- Fiona Ling
- Dec 7, 2024
- 8 min read

Can't wait to be shockingly smart with Arduino (Just kidding, safety first :>)
안녕하세요(Means hello) (●'◡'●) welcome back to another blog, this time we are doing something different......
✨Introducing ARDUINO DENG DENG DENG!✨
For this blog I will be showing what I have learnt through these two example:
Input device "Interface a potentiometer analog input to Maker UNO board and measure/ show its signal in serial monitor Arduino IDE"
Output device "Interface 3 LEDs(Red ,Yellow ,Green to Maker UNO board and programme it to perform an action (fade or flash etc). Use the pushbutton on the Maker UNO board to start/stop the action."
Seems complex, right? But hang in there, I'll explain what I need to do, and it will become clearer 💗
"Today we will live in the moment unless it's unpleasant in which case me will eat cookie" - Cookie Monster
Task 1: Input device - potentiometer
(1) I found myself wondering if I paid attention in class....
I decided to go with option (b) because it seems more intriguing due to the turning knob. Perhaps it's because I'm a gamer girl and I enjoy interacting with a big button?
Before starting the setup of the Arduino, what in the world is a potentiometer?
This YouTube video came at the right moment, it help me understand more on how to use this device:
(2) It all makes more sense now! Here's a brief overview of what I learned:


(3) Time to code... or as I like to call it, "Let's see how many snacks I can consume while staring at a screen!"
The code that I used can be found in <File> - <Example> - <Basic> - <AnaLogReadSerial>
ps: idk why i can't format the table help....so let's use gif instead
Code | Meaning |
void setup() { Serial.begin(9600); } | Setup function where you initialize things like communication, pin modes, etc. It runs only once when the Arduino powers on or resets.Initialize serial communication at 9600 bits per second |
void loop() { | The loop routine runs over and over again forever |
int sensorValue = analogRead(A0); | Read the input on analog pin 0 |
Serial.println(sensorValue); | Print out the value you read |
delay(250); } | Delay in between reads for stability[Use 250ms to slow down the device output for easy reading] |
(4) The ultimate outcome 🌟✨
Have fun watching the video ~
The setup ~

(5) The problems I encounter .....
Inserted the USB cable to the wrong port:
When I was setting up the code and testing it, the software showed an error about reading the signal. Initially, I thought it was because of a faulty cable, but that shouldn't be the case as the lights on the Arduino are on. So, I went to check the port number in the device manager and it was not showing anything. Then, I realized I connected to the wrong one, oopsies... Although the lights on the Arduino was on, because of the electricity supply from the laptop, it was actually not detected by my laptop. Hence, after I inserted the cable into the correct port, everything is back to normal.
Connecting the wires in the wrong holes:
Initial wrong connection of wires
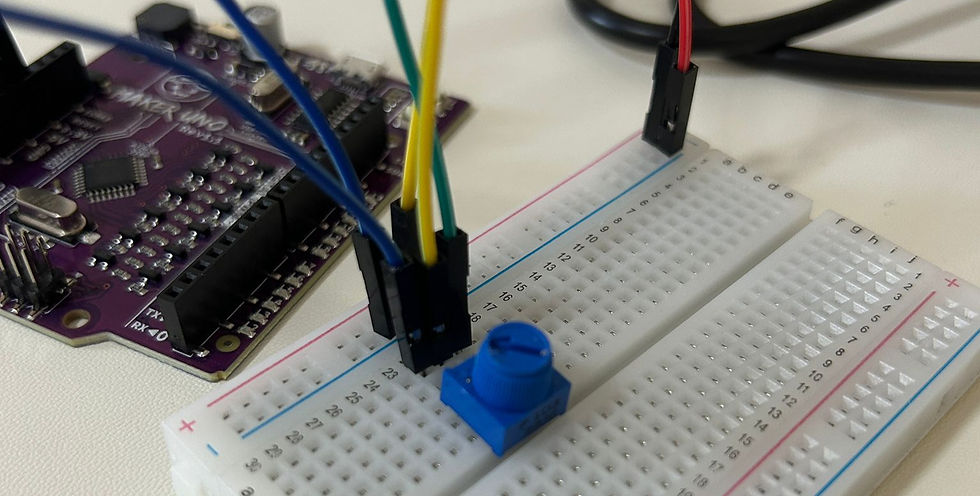
The green wire is to collect data from the circuit device and send the signal to the analog pin 0 for reading. The middle pin has the value of resistance that changes according to the turning of nob. In this case, the green wire is connected to the outer pin of the potentiometer hence data cannot be collected and it will shows error.
The correct setup

So, this marks the end for the potentiometer; being held up for 30 minutes due to incorrect wiring is not the girl boss vibe.
My brain cells
⊹₊ ˚‧︵‿₊୨୧₊‿︵‧ ˚ ₊⊹
Task 2: Output device - LED Lights
HOHOHO 🎅🏻🎄❄️🎁✨
This is the exciting part.
With Christmas approaching, I can create my own LED light programming, even if it's just 3 lights. Nonetheless, it's still fascinating, and I'm about to start the blinking.
Perhaps Santa will visit because of my lights.🦌🎅🏻 ˗ˏˋ★‿︵‧ ˚ ₊⊹
(1) Preparation for better understanding and reference
During our in-class activities, we had learnt how to make the light blink and using a pull-up resistor with the example code in the Arduino IDE.
So this time round, we will be combining both codes so that the LED lights will blink after the button is pressed.
This video help me understand about how to setup the breadboard (✿◡‿◡)
(2) The magic code
Code | Meaning? |
const int ledPin_11 = 11; const int ledPin_12 = 12; const int ledPin_13 = 13; const int buttonPin = 2; | Define all pins and button: Pin_11 is GREEN Pin_12 is RED Pin_13 is YELLOW Pin_2 is the internal pullup resistor |
void setup() { pinMode(ledPin_11, OUTPUT); pinMode(ledPin_12, OUTPUT); pinMode(ledPin_13, OUTPUT); pinMode(buttonPin, INPUT_PULLUP); } | Set LED pins as output Set button pin as input with internal pull-up resistor
|
void loop() {
buttonState = digitalRead(buttonPin); | Read the button state |
if (buttonState == LOW) { for (int i = 0; i < 5; i++) { digitalWrite(ledPin_13, HIGH); delay(200); digitalWrite(ledPin_13, LOW); delay(200); digitalWrite(ledPin_12, HIGH); delay(200); digitalWrite(ledPin_12, LOW); delay(200); digitalWrite(ledPin_11, HIGH); delay(200); digitalWrite(ledPin_11, LOW); delay(200); } } } | This check the condition of a button. Low indicates that the pull-up resistor is pressed. The code about "if" statement will only occur if the button is pressed. for (int i = 0;i<5; i++) The loop will runs 5 times. Each time the loop run, the variable i increase by 1, until 5 times are completed. digitalWrite This is to turn on / off the LED lights Delay (200) Wait for 200 milliseconds |
(3) Video from the night disco

But it wasn't as smooth sailing as I thought it would be
(task 2 crushed my confidence gained from task 1...)
(4) Problems that I encounter
The use of wrong codes:
When defining the "if" statement, the idea is to give actions when the pull-up resistor is pressed. However, there was something wrong with the code that it didn't work as what it suppose to be... 🫠 Tried troubleshooting it myself, but I was too confused about all the codes. So, I asked chatGPT to troubleshoot it for me.
✅ Correct code should be: if (buttonState == LOW)
instead I did
⛔ Wrong code: if (buttonState == HIGH)
So, instead of having the actions occurred after I pressed the button, the LED lights start flashing before i even pressed the button.
Not understanding the electricity flow in the breadboard:
This was my initial setup:

After I run the programme, the LED lights were not turn on 😭
I doubled checked the wiring to confirm the positive and negative terminals were connected properly. It still doesn't work...
Hence, I referred to the YouTube video showed above for the correct wiring connection.
And it worked!!
For the circuit to work, it needs to be in closed loop to allow the flow of electricity current.
The electricity flow in a breadboard:

Electricity flows in a breadboard through its internal metal strips, which are arranged in rows and columns to create connection points.
There's no connection between the yellow and blue parts of the breadboard.
The power rails on the sides (marked with "+" and "-") run horizontally for distributing power and ground.
The vertical pink colored rows are connected.
Components and wires inserted into the pink line or rail share an electrical connection, allowing current to flow between them.
Faulty LED light:
After the wiring problem was solved, all the LED lights were on. I decided to change the LED lights so all of them have different colour. However, to my surprise all the LED lights are not on. Since, I had already confirm the wiring is correct with the previously LED lights groups, hence, I came up with the assumption that the replaced LED light is faulty. I change the faulty light and all went back to normal.
Then I recall what happen to that particular LED light.....When I was connecting the wires, I had the cable inserted to the Arduino so there is power supply to it. I forgot to insert the resistor first and straight away inserted the LED light. It had a glow and died. I thought it was the wiring problem or something. I did not expect my Led light to just died in my hands....

SO...... to make my life easier, I need to finish the setting up of wires and circuit components before I can turn on the electricity power.
Don't play with electricity, kids
Reflections and my takeaways 💗✨
It has been a tough journey for me to understand electronic stuff and coding at the same time. To be honest, one of the reasons why I chose to study chemical engineering is because there were no big proportions of electronics-related topics. I was so shocked when I saw that Arduino kit on my table; my jaw dropped in disbelief. Learning about electronics and coding has been challenging, but I am determined to improve. I never expected to work with an Arduino kit, and it felt overwhelming at first. However, I know that facing these challenges will help me grow and become better at my studies.
You can't escape what you are fated for, so let's just start learning and complain less.
🔥❤️🔥
After all the challenges that I faced, paying attention to details really can make a lot of difference. When doing coding, every uppercase or lowercase letter, even symbols, can turn your life upside down. From the two tasks mentioned above, consider how many careless mistakes I have made and the time wasted on them. However, I must say, I learned from every one of my mistakes, and it will always be at the back of my mind. Learning to focus on small details has helped me improve my work. I now double-check everything before I submit it. This habit saves me time and makes my coding better.
Patience is really the key to success for everything. The practical where we need to make a component of our cardboard shark really makes me very anxious. I was not good with the coding part, so I helped my team more on the aesthetic aspect instead. What really challenge us was how to make sure the servo and the moving component stick together. May sounds easy, but in that moment we can't do it. I did whatever that I can, to make the shark jaw opened but cannot closed.😭😭My poor shark .....
Say hi to Shelly🦈
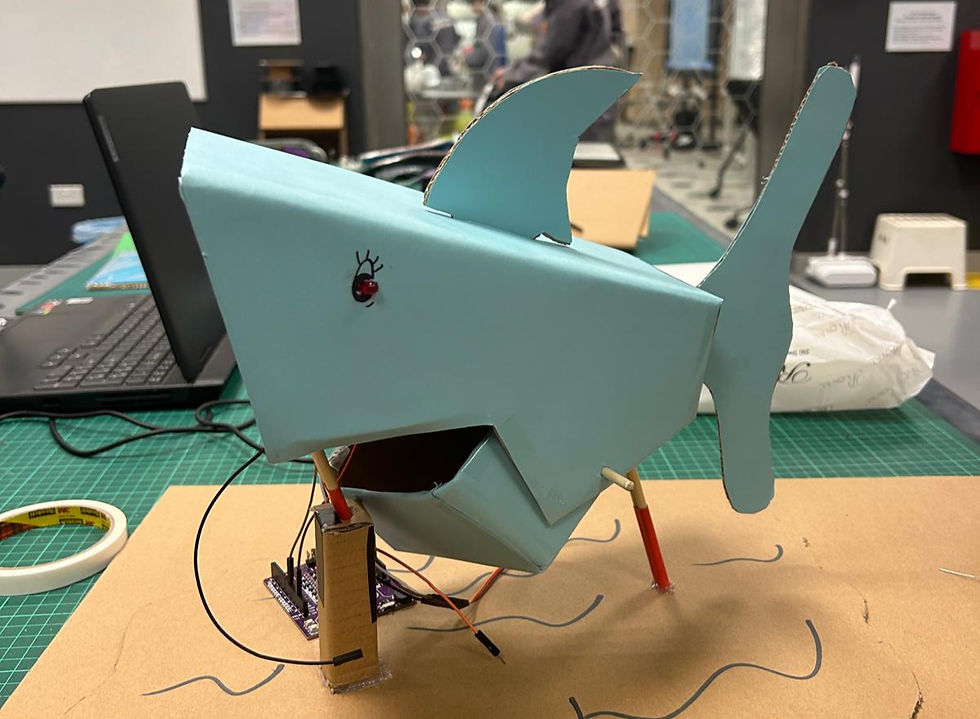
Although the shark is not the best prototype that my group made, we had our fun. I am actually proud of myself that I can go that far and be proactive in learning more about Arduino (because I really want to understand what Muhsin is saying, too much technical stuff). Good thing is, I learned how to connect different parts together thus I feel more confident in my skills.
Oh, and the biggest headache was actually the breadboard. The last time I touched a circuit setup was back in secondary school, and I wasn't even good at it back then. Sometimes I feel overwhelmed easily by things that I did not expect to come into my life. So instead, I told myself to calm down, breathe, and Google it. Anything that I forgot, I can just search for it as a self-created supplementary class. Computers can't understand what I'm trying to do with my code, no choice but to understand them instead. 😎
That's all for this blog. I hope my readers can see my growth in this topic through this blog. Although all the things that I'm learning now are the basics, we need to start with something simple, am I right? Maybe one day I'll get better at it and do some interesting stuff, hmmm... But anyways, it's only been one term about Arduino, and it felt like ages. Learning something new does take a lot of your time, but the taste of success really makes me happy, like genuinely. Seeing the tasks that I have completed just shows that nothing is too hard; it's just about how much effort you put in and what's your approach.
Hope everyone has a good journey in their learning as well~~ See y'all next time!


Comments